How to Photograph the Milky Way
August 31, 2020
What is the Best Sony Mirrorless Camera for You?
August 31, 2020
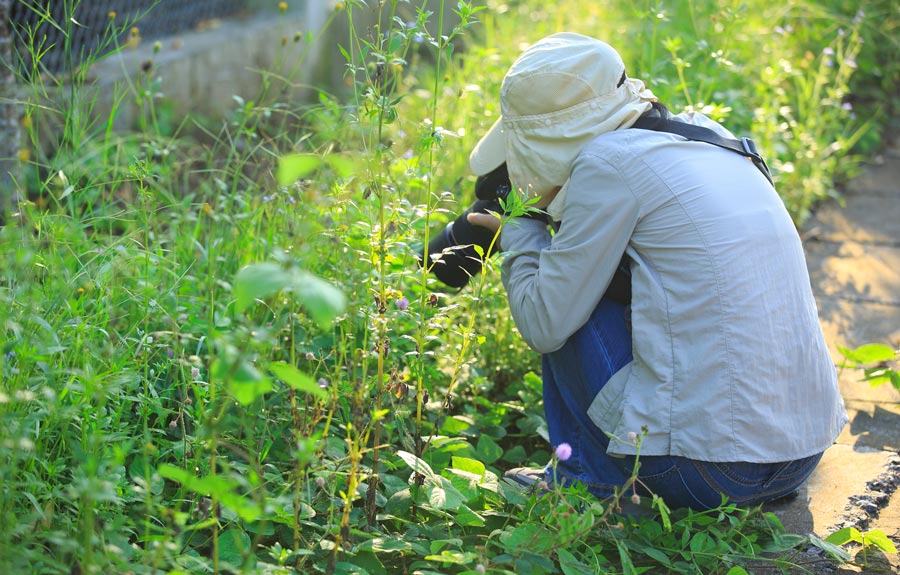
If you’ve ever seen a picture of the tiny details on a flower or the intricate pattern on an insect and wondered how that photo was taken the answer is relatively simple: with a macro lens. Macro photography is the art of making small objects look life-size or larger. It can render tiny objects with incredible detail not possible with the naked eye or a standard lens. These types of shots can be challenging to take – but also incredibly addictive.
Macro vs. Regular Lenses
While macro lenses are often used to take photos of things close up, how they’re used isn’t actually what defines them. A macro lens has the ability to focus from infinity to 1:1 magnification, meaning that the size of the image in real life is the same size as it’s reproduced on the sensor. The magnification ratio tells you how the image projected on the camera’s sensor compares with the subject’s actual size, so a lens with a 1:2 ratio can project an image on its sensor up to half the size of the subject while a lens with a 5:1 ratio can project an image five times the size of the subject. Macro lenses also allow for closer focusing distances than normal lenses and often require you to get very close to your subject.
Macro Lens Pricing
As with all lenses, macro lenses are available in a wide variety of price points. The good news is that they’re not necessarily more expensive than a regular, non-macro lens. You can expect to spend anywhere from $300 to $1,500 or more to purchase a macro lens. For those who would like to try before you buy, BorrowLenses rents macro lenses for as little as $6/day as part of a 7 day rental. Keep in mind that to do macro photography properly you will also most likely want a tripod and some kind of lighting set up (more on that later).
One of the great things about macro lenses is that they’re not just useful for macro photography. Macro lenses are also very good at portrait photography. A wedding photographer can use a macro lens to take closeup shots of a ring and then just as quickly capture beautiful expressions of guests. A typical portrait lens can capture those candid moments but can’t take the closeup shots of tiny details like wedding rings very well. Be aware that a macro lens can sometimes produce images with more contrast (meaning the lenses can often better resolve similar tonal values and find boundaries between tiny areas with different luminance). So, depending on your portrait tastes, you might have to adjust your editing process accordingly.
Macro Lens Focal Length Options
As with all lens types, macro lenses come in a wide variety of focal lengths. Your focal length determines your working distance from the subject. The longer your focal length, the further you will be from what you are trying to shoot. A 100mm macro lens will be at twice the working distance of a 50mm macro lens, meaning you have to be twice as far from your subject. How you intend to use your macro lens has a large impact on what focal length is best for you.
40-60mm
This focal length is ideal for when you want to be as close as 6″ from your subject. Things like inanimate objects or subjects that can’t be scared away are perfect for a lens of this length.
90-105mm
This mid-range focal length is great for things that you want to shoot from around a foot (or more) away. These lenses work really well for photographing things like insects, flowers, and plants.
150-200mm
This focal length is ideal for taking pictures of subjects from farther away. If you don’t want to get too close to your subjects or are afraid you may scare them away, lenses in this focal range are a great choice.
Macro Usage Tips
Minimum Focus Distance
Minimum focus distance determines how close you can be to your subject. Generally speaking, the longer the focal length, the further you must be from your subject to be able to focus on it. Some subjects, especially when shooting insects and other animals, are more skittish than others and may be frightened away by you.
Depth of Field
One important thing to keep in mind when doing macro photography is that the depth of field is very limited at close range. To get more of your subject into focus, you’re going to have to stop down. If you’re used to shooting very wide, this will take some getting used to. In order to have as much of your subject as possible in focus, you’re going to want to stop all the way down to a very narrow aperture (e.g. f/18) and try to get your subject as flat as possible. At this type of magnification, it doesn’t take much for things to start to go soft. Getting the majority of your subject on the same plane of focus will help you keep as much of it as sharp as possible. Many macro shooters employ a technique called “focus stacking” to combat this (discussed further below).
Flat Field
The front element on non-macro lenses is generally slightly curved, making it so that the center of the photo will be in focus but things will get a little bit softer as you move to the edges of the frame. This happens when a curved focus plane is used on the flat sensors of digital cameras. It isn’t usually noticeable or problematic in normal, non-macro photography but when you start photographing things that are close and tiny, it can become very noticeable. Most macro lenses have what is called “flat field” focus; they try to compensate for this curved focus plane so that the edges of the frame are all in the same focus as the center and detectable curvature is reduced. This is especially useful when photographing small, flat things like coins or postage stamps. It doesn’t matter as much when you’re shooting subjects in 3D, such as insects and flowers.
Focus Stacking
Focus stacking is a technique that allows you to combine multiple photographs with different focus distances to produce a single image with more of a subject in focus. Some cameras, like the Olympus OM-D E-M1, have this feature built in, so all you have to do is set up your shot and focus options and the camera will shoot and combine the images all in-camera. But more often you’ll have to adjust the focus yourself and use Photoshop or other software to combine the images. Focus stacking can be a lot of work but it can also produce some amazing images. Learn more in Macro Photography Tricks for Beginners.
Stabilization
Stability is very important in macro photography. While some cameras and lenses have stabilization built in, nothing can quite match the effectiveness of a tripod for taking macro shots. Tripods can be big, heavy, and bulky to carry around but when it comes to macro photography they are a vital tool. The closer you are to your subject, the more noticeable camera shake becomes.
A good tripod can hold your camera steady so your shots are clear and sharp. Having your camera on a stable base will also allow you to stop down and shoot with a longer shutter speed so that you can get more of your subject in focus. Being able to use a longer shutter speed will also let more light in, which is useful when shooting in darker places (e.g. indoors, or a low-light outdoor setting). A rail system can be attached to a tripod to help get more of a subject in focus when used with the focus stacking technique.
Camera Shake and Macro
Another thing that will help tremendously in avoiding camera shake is not physically touching the camera before taking the picture. There are several ways to do this. The most common way is with a cable shutter release (for example, the Canon TC-80N3). Shutter releases are inexpensive, easy to use, and plug right into your camera body so that you can fire the shutter without touching the camera. Another option is to set a timer delay for a few seconds so that the shutter doesn’t actually open until after you’ve removed your hand from the camera. If you’re using a Canon macro lens this can be done in “drive” mode on your camera. When using a Nikon macro lens, this can be done using “self-timer” mode on the drive mode dial. If your camera can be controlled by your phone via WiFi, that is another option available with most newer models.
Pocket Wizards as Shutter Triggers
Did you know you can use Pocket Wizard triggers as remote shutter releases? Here’s how:
• Get 2 Pocket Wizards and set them to the same channel.
• Attach a remote camera cable (we have them for Canon and Nikon) between your camera and 1 Pocket Wizard.
• Turn on your Pocket Wizards then the camera.
• Keep one Pocket Wizard in your hand and press the TEST button to fire the shutter!
• TIP: Make sure you check your focus first if shooting in manual focus prior to pressing the TEST button. If you are in autofocus, the lens may need a second to hunt for focus prior to opening the shutter.
Lighting in Macro Photography
Good lighting is one of the most important factors in taking good photos and macro photography is no exception. But getting sufficient light in macro photography can be a bit of a challenge. When conditions are ideal, natural light can produce beautifully lit images. At times when the sun is low on the horizon, backlighting can look amazing as it streams through the wings of an insect or the petals of a flower.
But for all of its benefits, working with natural light can be exceptionally difficult in macro photography. The narrow apertures you need to keep your subject in focus can make it tough to get enough light on your sensor and you are always at the mercy of changing light conditions and movement of your subject. Working with only natural light for macro photography can be frustrating and make things a little tough. Fortunately, there are some solutions!
Ring Lights for Macro
LED ring lights can be a simple and affordable solution to macro lighting issues. They usually fit on the end of your lens, or around your lens, and can provide nice, even light over a subject. While they are not as powerful as a typical flash, they are an effective continuous light source that is easy to use. Something to consider when using ring lights in macro photography is that the ring itself can often appear in reflective surfaces like a shiny shell or eyes of an insect. While this effect can add some interest to a subject, it can also be distracting if it shows up in unwanted areas of an image. Recommendation: the FotodioX C-318RLS Flapjack Bi-Color LED Ring Light Kit has a unique inward-pointed, outer-edged build for its nodes that results in natural diffusion – better than most direct-facing continuous lighting options of this same size.
Macro Lens with a Built-in LED Light
The long barrel of the Venus Optics Laowa 24mm Canon EF Mount Cine-Mod Probe Lens is useful for documenting habitats and the insides of products for compelling results without having to be too close to the subject. What’s more, the front barrel of this lens is completely waterproof so that you can capture fish between rocks or the inside of a glass as something is poured into it. The 20mm diameter lens tip is small enough to not completely overshadow a small subject, making lighting a tiny object much easier. The lens comes with a built-in LED ring light. Please note that to operate the built-in LED on this lens you will need to use an external USB power source. You can also rent these in the non-cine version for Sony E mount and Nikon F mount.

The Venus Optics Laowa probe lens is unique in that it not only can insert itself into habitats and water but it also has a built-in LED at its tip!
Flash Lighting for Macro
Another option for lighting in macro photography is to use a traditional flash, either on or off the camera. Flashes have the benefit of being extremely powerful, allowing you to very easily produce enough light to illuminate your subject. The downside? Sometimes they are too powerful. Diffusers can help cut down on some of that light and give you the effect you are looking for. Using off-camera flash in macro photography allows you to control the direction from which the light is hitting your subject so that you have complete control of the image. Two macro-specific flash lighting systems to explore are the Canon MT-24EX Macro Twin Ringlite Flash and the Nikon R1C1 Wireless Close-Up Flash. Both have sets of adapters rings for almost any sized macro lens.
Focusing a Macro Lens
Due to the magnified nature of macro photography, nailing focus is incredibly important. A macro lens will magnify not only the tiny details of your subject but also any mistakes you make! When your subjects are this tiny, sometimes the smallest adjustment in focus can be the difference between a photo that is ready to be printed and hung on your wall or one that automatically goes to the trash bin. You will have a very small margin of error in focus for these kinds of shots.
While most macro lenses have built-in autofocus, we’d recommend shooting in manual focus mode. Often a lens will hunt around endlessly while it tries to lock focus. Manual focus allows you to select, with extreme precision, exactly where you want your focus point to be. This gives you more control when taking your photos. Think of it as having a razor thin sliver of focus you’ll want to hone in on. When relying on AF, make sure you know the difference between a Focus Area and a Focus Point – and how to set your point exactly where it needs to be. Learn more in All About Autofocus: Focus Area vs Focus Mode for Beginners.
The Best Macro Lenses
With all that in mind, here are some of the best macro lenses around:
1. Canon MP-E 65mm f/2.8 1-5x Macro Lens
The Canon MP-E 65mm f/2.8 1-5x Macro Lens is a specialty tool for extreme closeup imagery. It renders subjects up to 5x life-size magnification. On a full frame sensor camera you can fill the frame with a grain of rice in vivid detail. It is strictly manual focus only and comes with a tripod support foot for attaching to tripods and rail systems. This lens is designed for scientific imagery as well as creative macro applications. Since this is a dedicated macro lens, it cannot focus more than a few centimeters away from the front element, therefore it is not recommended for portraits or anything other than macro work.

An example of what the Canon 65mm MP-E can do. Butterfly wings taken by Alexandria Huff.
2. Nikon 105mm f/2.8G IF-ED AF-S VR Micro Lens
In addition to being a sharp portrait lens, the Nikon 105mm f/2.8G IF-ED AF-S VR Micro Lens is also a reliable, crisp macro lens. With a 12” minimum focusing distance, you can get up close to plants and insects for 1:1 reproductions and sharply rendered details. This lens also has the advantages of Nikon’s Vibration Reduction built-in for shots requiring a longer shutter speed than you can typically hand-hold for (though we still recommend a tripod).
3. Sigma 70mm f/2.8 DG Macro Art Lens for Sony E Mount
This lens is ideal for close-ups, fine art, nature, and portraits. Delivering lifesize 1:1 magnification and a new coreless motor for the smoothest possible AF, this Sigma 70mm f/2.8 Macro Art is designed specifically for Sony’s full frame mirrorless collection but can also be paired with APS-C sensor cameras or used in crop mode. This lens has a minimum focus distance of 10.16″ and works well for everything from insects to portraits. It is also available in a Canon Mount.
Conclusion
If you’re looking for something to take your photography to a whole new level or you simply want to explore other avenues for creating new work in the comfort of your home or in your own backyard, a macro lens is a great investment. While they can be a little tricky to learn to use, the images they produce are downright stunning – plus they double as great portraits lenses (with the exception of the MP-E, which is for extreme closeup work only). Macro photography is great for people who have been doing photography for a little while but want a new challenge. It’s also a really fun genre for people who like to work alone in nature.
This post has been updated to reflect recent macro recommendations.
Tags: focus stacking, macro photography Last modified: August 25, 2020


