Applying Your Histogram to Make Better Shots
August 31, 2020
What is a Macro Lens? Everything You Need to Know as a Beginner
August 31, 2020
There is something moving about being out under a starry night sky that is hard to capture with words. As photographers, with the right preparation we can create images that will convey a sense of awe more than words can describe. The Milky Way is among my favorite subjects to shoot. Now, this subject favors some regions more than others (see Best Seasons and Locations for Night Sky Photography). But for those with the opportunity, I am here to help you prepare for a successful shot.
When to Photograph the Milky Way
Photographing the Milky Way poses a couple of challenges but they can be fun challenges. First, there is a Milky Way “season”. In North America the optimal time for photographing the Milky Way is roughly June-September. During these months, the Milky Way (and its most prominent portion known as the “galactic core”) are visible starting around 12 AM EST in June, and then earlier as the season progresses. In September, the galactic core rises closer to 10PM EST and sets below the horizon near 1AM. Keep in mind that these times – although consistent – will be affected by your specific region by factors like whether you have clear horizons. Where you live there might be a mountain range blocking your view of the Milky Way!
Where to Find Great Views of the Milky Way
Locating the Milky Way in the night skies is actually quite simple. Once the sun has set and the skies are very dark you will find the Milky Way rising from the southern horizon. The key to actually seeing it lies not only in finding a dark place with a clear view of the southern skies – you also need to try and find it during a new moon (or when there is very little visible moonlight). Using a resource like the Photo Pills app, you can determine when there will be a new moon and even see within the app the rise and set times of the Milky Way’s galactic core. Your biggest challenge will likely be getting away from light pollution from nearby cities (but if cities are your thing, also check out How to Shoot Great Cityscapes at Night). Learn more about Photo Pills and its amazing features in Photo Pills Guide for Sky/Night Photography.

Photo Pills provides a wealth of information, including exact location of the sun, moon, and stars, as well as the center of the Milky Way in the sky at any date – past, present, or future – from any location on the planet.
Find out where the good southern-view areas are for your region, preferably with as much distance from a city as possible. When I am scouting locations, I don’t just look for a clear view but also for a point of interest to put into the composition. Where I am in Michigan, a popular example are the many lighthouses we have along the shores of Lake Michigan.
Recommended Camera Settings for the Milky Way
Start by getting your camera mounted to a tripod and facing south. As mentioned, I recommend framing your shot with something compelling in the foreground to help build some depth and story into the image. From there you will put your camera into manual mode and switch your lens to manual focus. Set your lens to infinity. To check it, there are a couple of ways to go about it but my favorite is to assign my camera’s magnify mode to a custom setting button for easy access or set the camera to switch into magnify when you’re manually focusing. For a mirrorless camera, you will use the EVF to focus but if you’re a DSLR user, I suggest switching to Live View. Try to find a very distant light – like a cellphone tower – to check your focus against. You want that light to look like a small pin point.

Using infinity focus on a lens is handy for night sky shooting. Use an EVF or Live View to focus on a star, your headlamp hung from a far tree, a cellphone tower, or any other very distant light. It is always a good idea to check your infinity focus point between shots, too.
Once we’re focused it’s time to adjust your camera settings to correctly expose for the Milky Way. Start off at your widest aperture. Set your ISO to 1600 (this is just to start) and the shutter speed will be variable depending on the focal length of your lens. To determine the maximum exposure time you can use without the stars streaking (remember – you’re not actually static, so long exposures will display Earth’s movement), use the following formula: 500 divided by the crop factor of your camera x focal length of your lens. Here are common crop factors:
1.0 – Full frame mirrorless/DSLRs
1.5 – APS-C (crop frame) in Nikon, Pentax, and Sony brands
1.6 – APS-C (crop frame) in Canon brand
2.0 – Micro Four Thirds (commonly found in Panasonic and Olympus cameras)
Example:
On the average crop sensor camera with a 24mm lens, I am going to take 500 / (1.6 x 24) = 13. I will then set my shutter speed to be 13 seconds long. Be careful when doing this equation! You don’t want to just take 500 then divide it by 1.6 and then times that by 24. You’ll get 7500! You have to remember your order of operations, or PEMDAS (so, parenthesis first): 1.6 x 24 = 38.4. Then, 500 divided by 38.4 = 13. By the way, 1.6 x 24 is also how you’d simply learn the effective field of view of your lens when on a crop frame sensor or when in crop sensor mode. Learn more about this in What You Must Know About Full vs Crop Frame Sensors Before Choosing a Lens.
With a full frame camera, you can skip the 500 / 1.0 part since you’ll just get 500. So then just do 500 / 24 = approximately 20 seconds.
This might not give you the exact look you want but it’s a very good starting point that allows you to not waste too much precious time fiddling with settings!

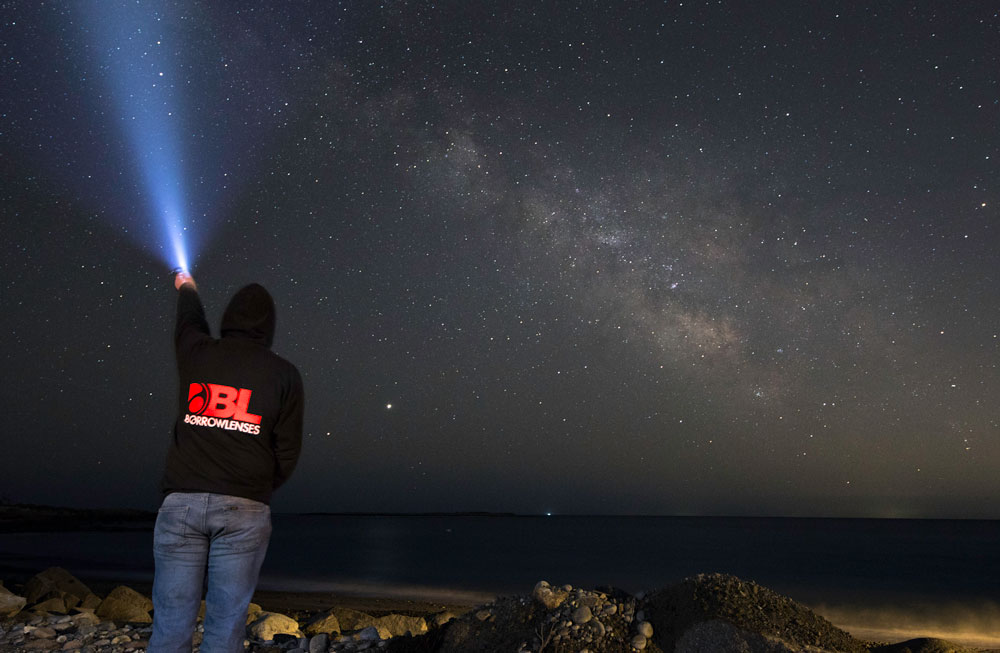
30 second exposure at f/1.8 and ISO 3200. I was using a 7mm lens on a Micro Four Thirds sensor. Using the 500 Rule, it recommended about 35 seconds.
Curious about the “why” of this 500 / (Crop Factor x Focal Length) equation? Here I will quote AstroBackyard at length:
“The sky rotates 0.0042 arc degrees per second, or in simple words, 360 degrees in 24 hours. If you own a full frame camera and use a 24mm lens, its horizontal view will be about 73.7 degrees.
Let’s say this camera has a 24 megapixel sensor (6000 x 4000). The before mentioned 73.7 degrees are projected onto 6000 pixels, resulting in 81.4 pixels/degree. With this kind of lens, the exposure time will be about 21 seconds according to the 500 rule (500/24).
The sky will move about 0.09 degrees during these 21 seconds (0.0042*21). 0.1 degrees = 7.3 pixels with this kind of a camera (81.4*0.1).
Exactly this number of pixels (7.3) is the maximum acceptable movement blur before the stars as we see them in the sky become star trails in the picture.”
What I Like to Shoot With
This past season, I used the Olympus OM-D E-M1X and a Sony a7 II. I am an Olympus Visionary/Educator so I have invested a lot of my skill in the Micro Four Thirds format. However, there is no denying the light gathering capabilities of a full frame camera for this genre. For lenses, I tend to use the M.Zuiko 7-14mm f/2.8 Pro and M.Zuiko 17mm f/1.2 Pro. However, BorrowLenses has a great list of the most popular lenses people use for night sky photography in a variety of mount types. If you’re an Olympus shooter like me, be sure to check out the Live Composite feature if you’re looking to take some creative shots of star trails or lightning.
Tags: Astrophotography, Night Photography Last modified: May 28, 2020


